Snow Leopard Web Server
Hosting a web site is one of the few things a Snow Leopard web server is one of the few things which runs on Mac Pro as good today as when these machines where new. It makes good use of an old mac where new software is becoming increasingly hard to come by.
Before Starting the Web Server
Setting up a Apache web server on OSX Snow Leopard can be done. To install Apache you need macports. You must have your web site as HTML documents. You will also need a modern laptop computer. This is as a companion machine to transfer files. The web browsers running on Snow Leopard these days don’t cut it.
You must also be able to route internet traffic from your public IP to one spacific machine. Depending on your brand you can use your router for that.
Eventually will need to register a domain to host your site on. We can skip the domain during the installation process. It is not required, but HTTPS will not work without it.
I would not recommend running a dynamic web page on a Snow Leopard. Running a dynamic backend on this OS today is unsecure, and PHP seems to be the only option for programming languages which can both run on Snow Leopard and host web sites.
This page describes the steps for setting up the web server;
- Install an Apache web server software
- Port forwarding to the server
- Upload the site’s files
- Add public DNS-record
- Install SSL certificates (optional)
- Set up a Dynamic DNS client such as dyndns (optional).
Port forwarding to the Server
At home my router is a Ubiqiti Dream Machine. This router comes with an option for port forwarding. So now all HTTP and HTTPS is forwarded to the machine I intend to host web sites from. For forwarding to the Mac Pro the machine must be set up with an internal static IP address.
So I had to set that up. To set this up I log in to the router’s web interface. My router can be accessed from google chrome on IP address 192.168.1.1. At the moment this is the IP of my router. First I needed a destination IP address to route traffic to. When logged in I clicked on Network > Client Devices > Mac Pro 1.1 > Settings > Fixed IP.
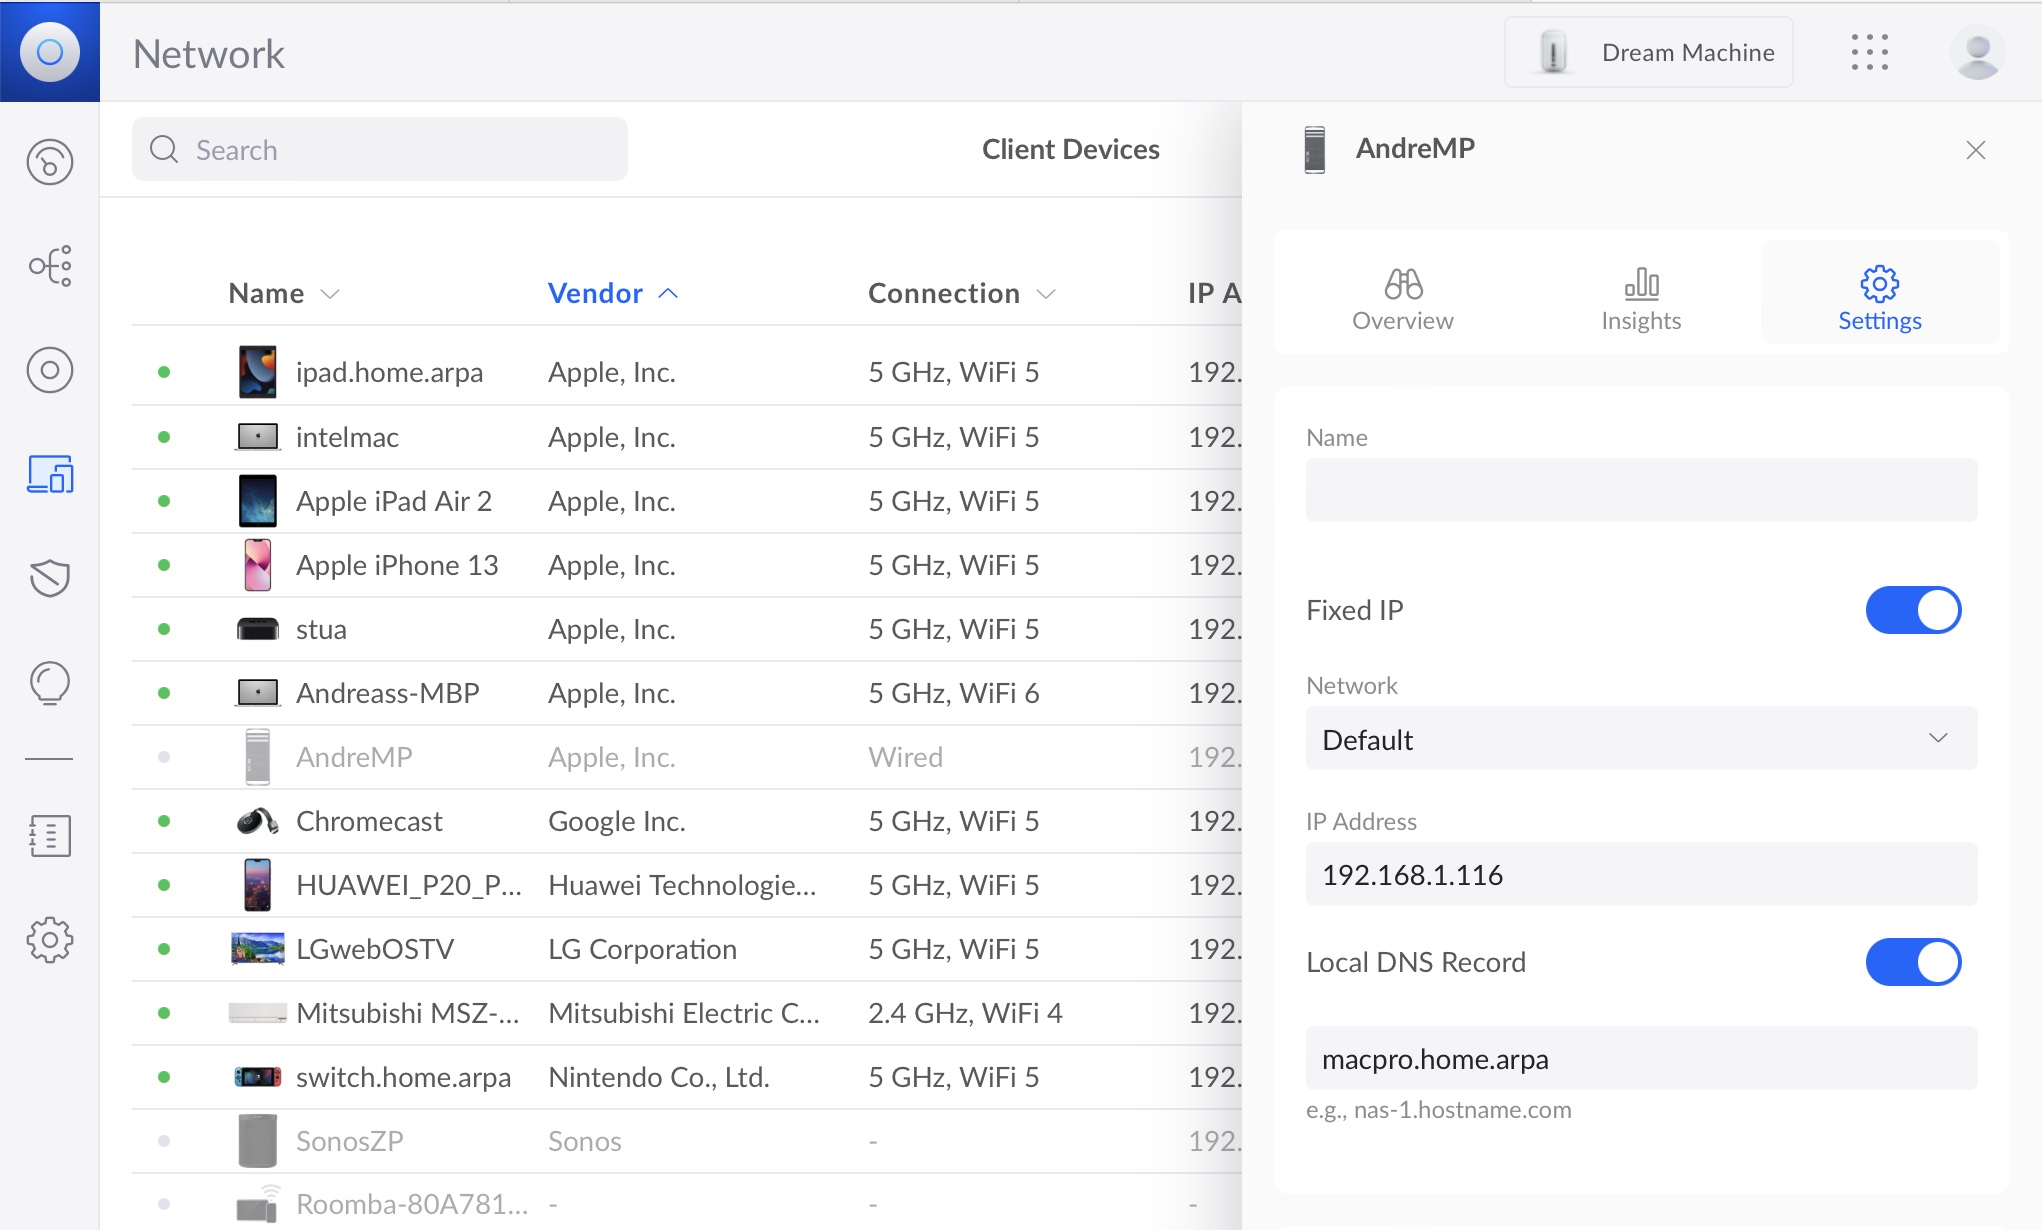
With a static IP address of 192.168.1.116 for the machine I can start forwarding ports.
Next thing I did was to click on Network > Settings > Firewall & Security > Create New Forwarding Rule. In the pop up box I routed all traffic from Any IP port 443 to 192.168.1.116 (my server IP) port 443 and similar for port 80. These ports are used for HTTP and HTTPS respectively.
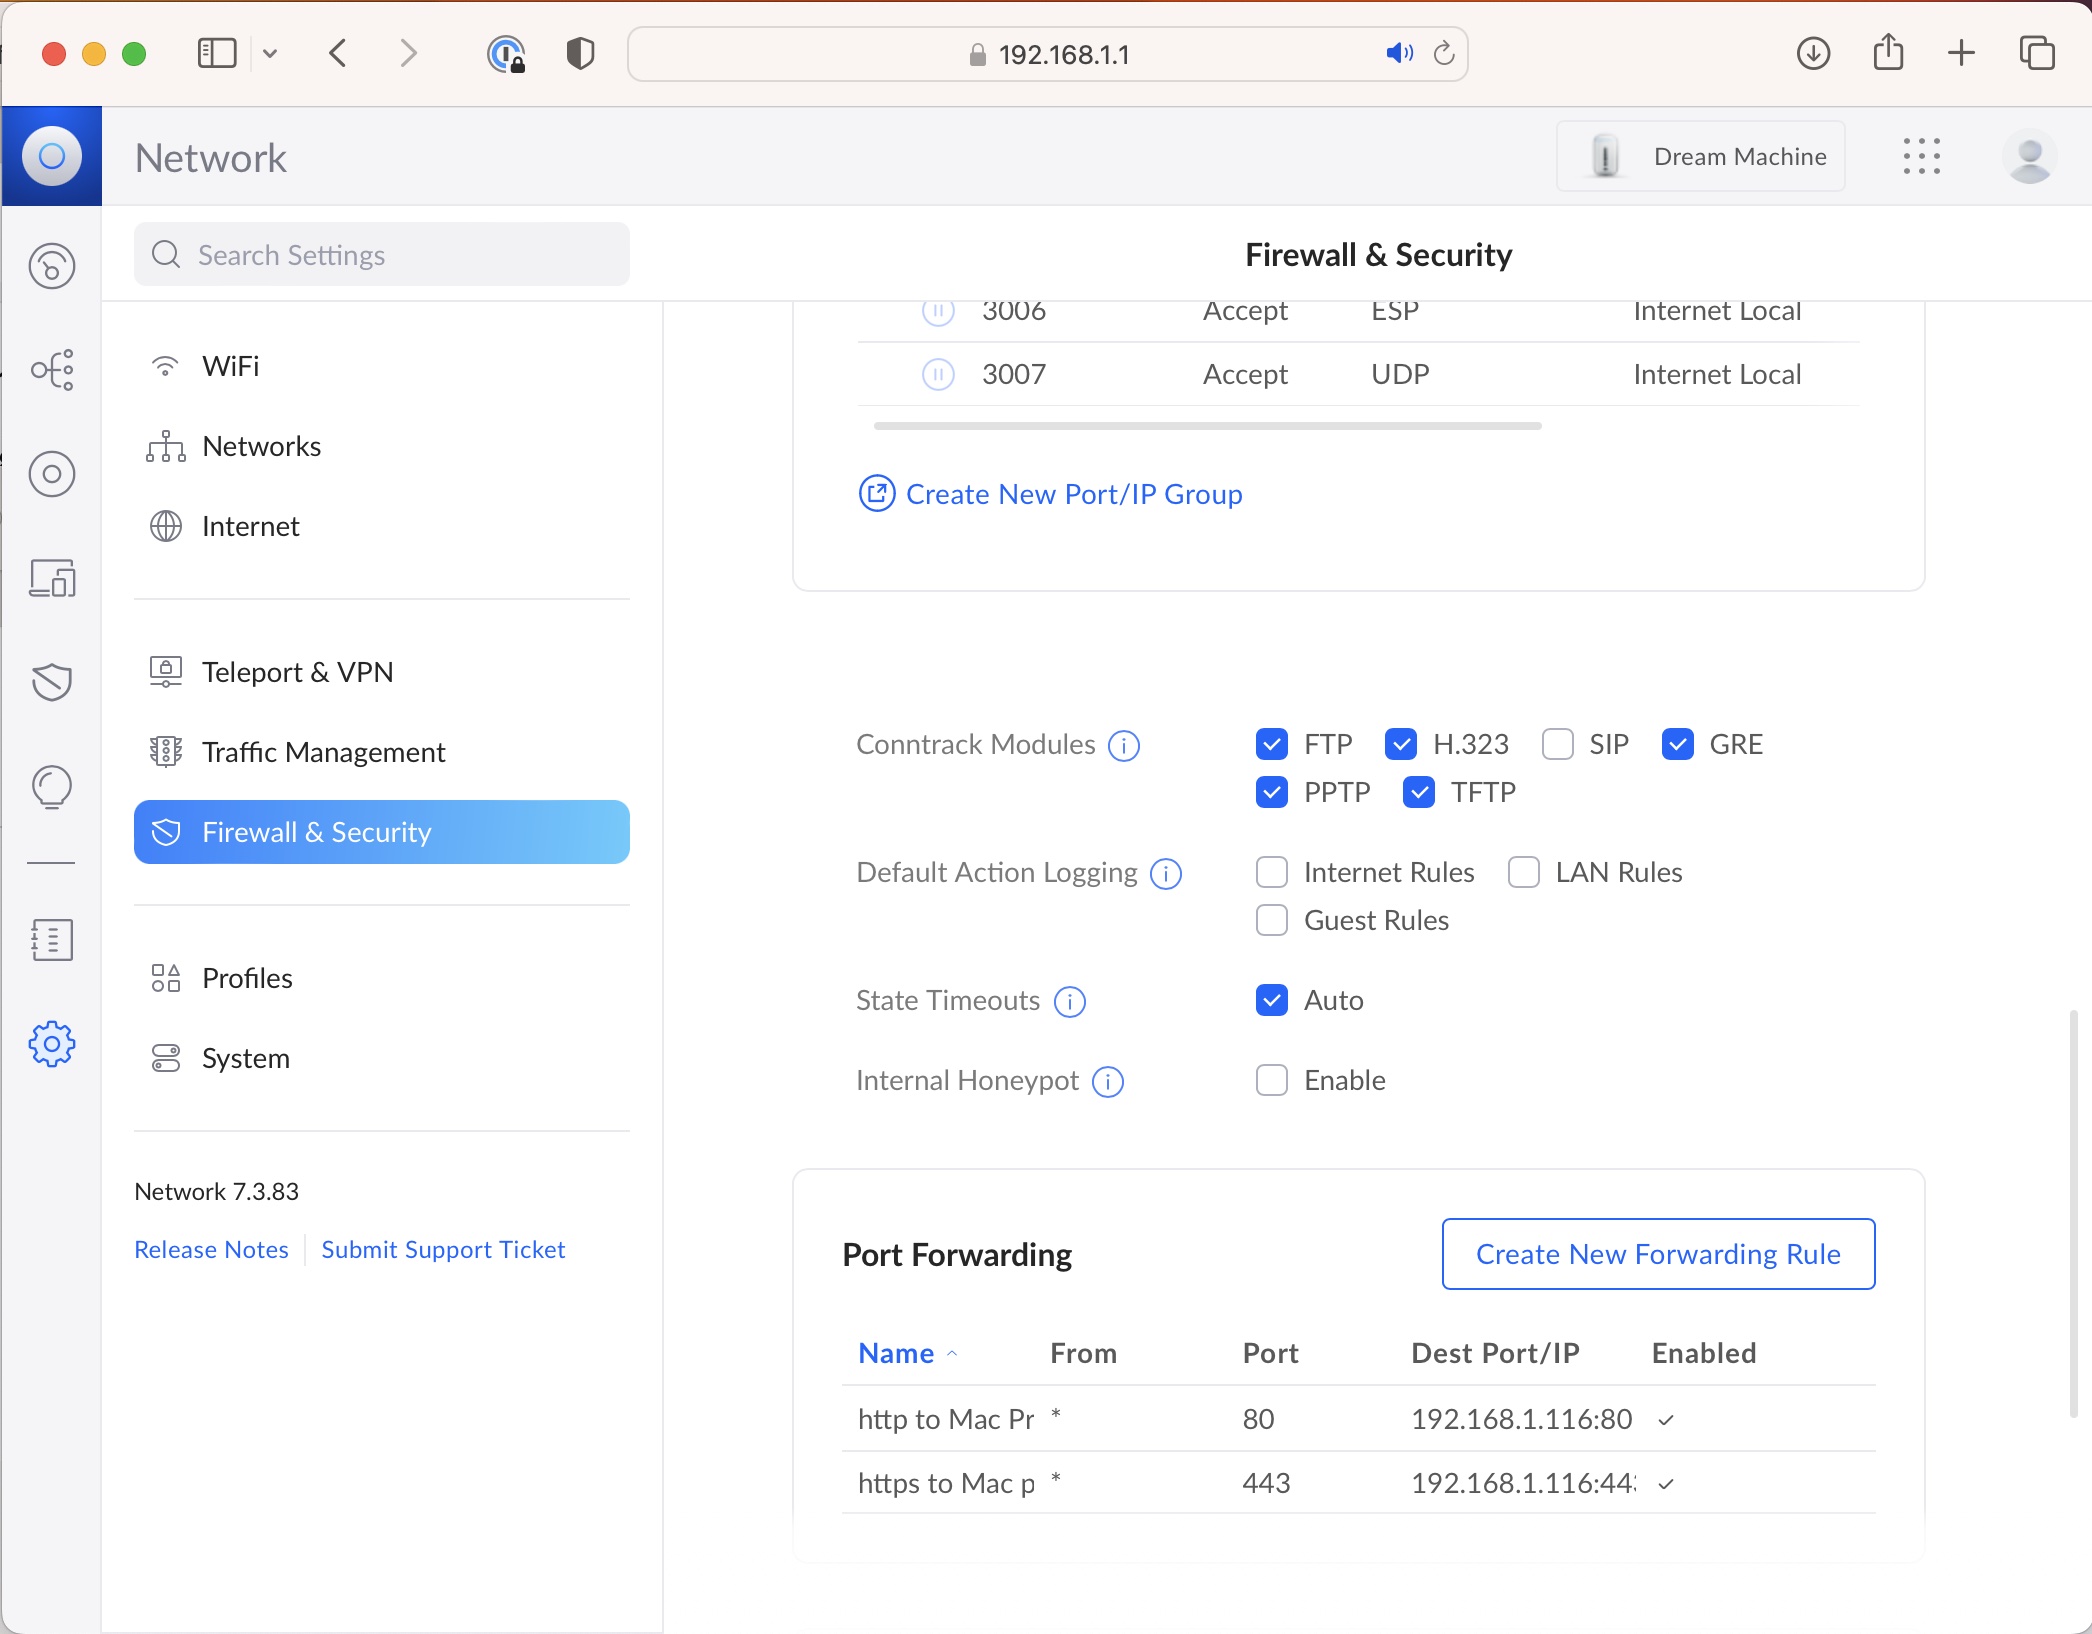
The server is now reachable from the internet.
Installation and Configuration
I am installing Apache Web Server from macports.
To do this I opened the terminal and ran the command.
sudo port install apache2
This takes a while. eventually the server installs just fine. The configuration files are available on /opt/local/etc/apache2. Macports uses launchd to start apache. This is convenient. The normal launchd commands works out of the box. If are new to launchd the commands are just one google search away.
Uploading the web site
The first configuration we need to do is to tell Apache where the web site is located. OSX Snow Leopard comes with an outdated Apache web server and an example web site in the user’s home directory ~/Sites.
You can go to this folder opening finder there by hitting command+G and typing in the path. This is where I moved my HTML documents.
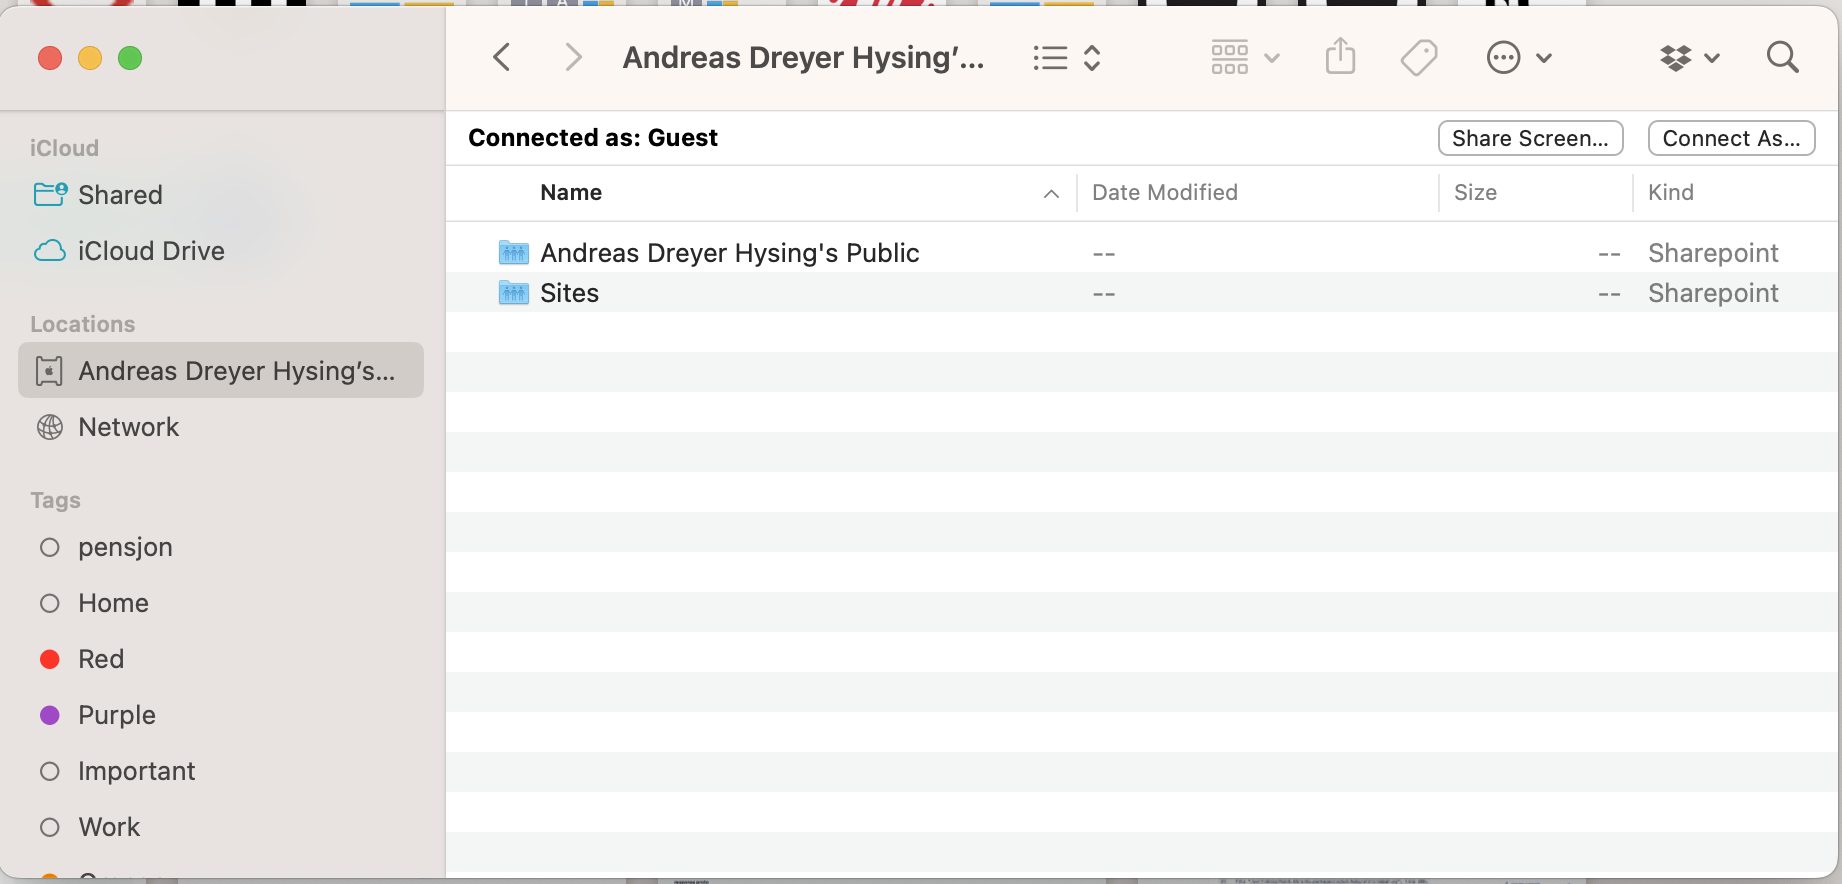
Once the files are in place I configed Apache to use those files by first turning on virtual hosts.
Virtual hosts gives Apache the ability to run multiple web sites on a single server.
This is turned on by editing /opt/local/etc/apache2/httpd.conf Uncommenting the line below
Include /opt/local/etc/apache2/extras/httpd-vhosts.conf
With Virtual hosts turned on I could point at the correct folder by editing /opt/local/etc/apache2/extras/httpd-vhosts.conf and adding
<VirtualHost *:80>
    <Directory /Users/andreashysing/Sites/oldmacblog.com/*>
        AllowOverride None
    </Directory>
    ServerName oldmacblog.com
    ServerAlias macpro.home.arpa
</VirtualHost>
I validated the configuration in the terminal by running apachectl -S and restarted the server with apachectl -k restart.
When all the configuration files passed I could visit the site from a web browser.
Updating dynamic IPs
Every time the public IP address at home changes I need to update the DNS record for the domain name. My home has a IP address which is fairly static. But I have seen the IP change during router restarts. When that happen my web site would go down. To solve this problem I would need a dyndns API to update my DNS record. My router has support for updating DNS changes. Router restarts are not happening often, but this dynamic DNS feature is too cool to ignore.
If you have a UDM router you can find it under Network > Settings > Internet. Click on the internet connection you have configured, and it should be right in the middle of the page under “Manual settings”.
The router has to ble able had to send dns updates over one of the providers the router provides.
Type in your dynamic DNS API server, username and password, and everything is ready.
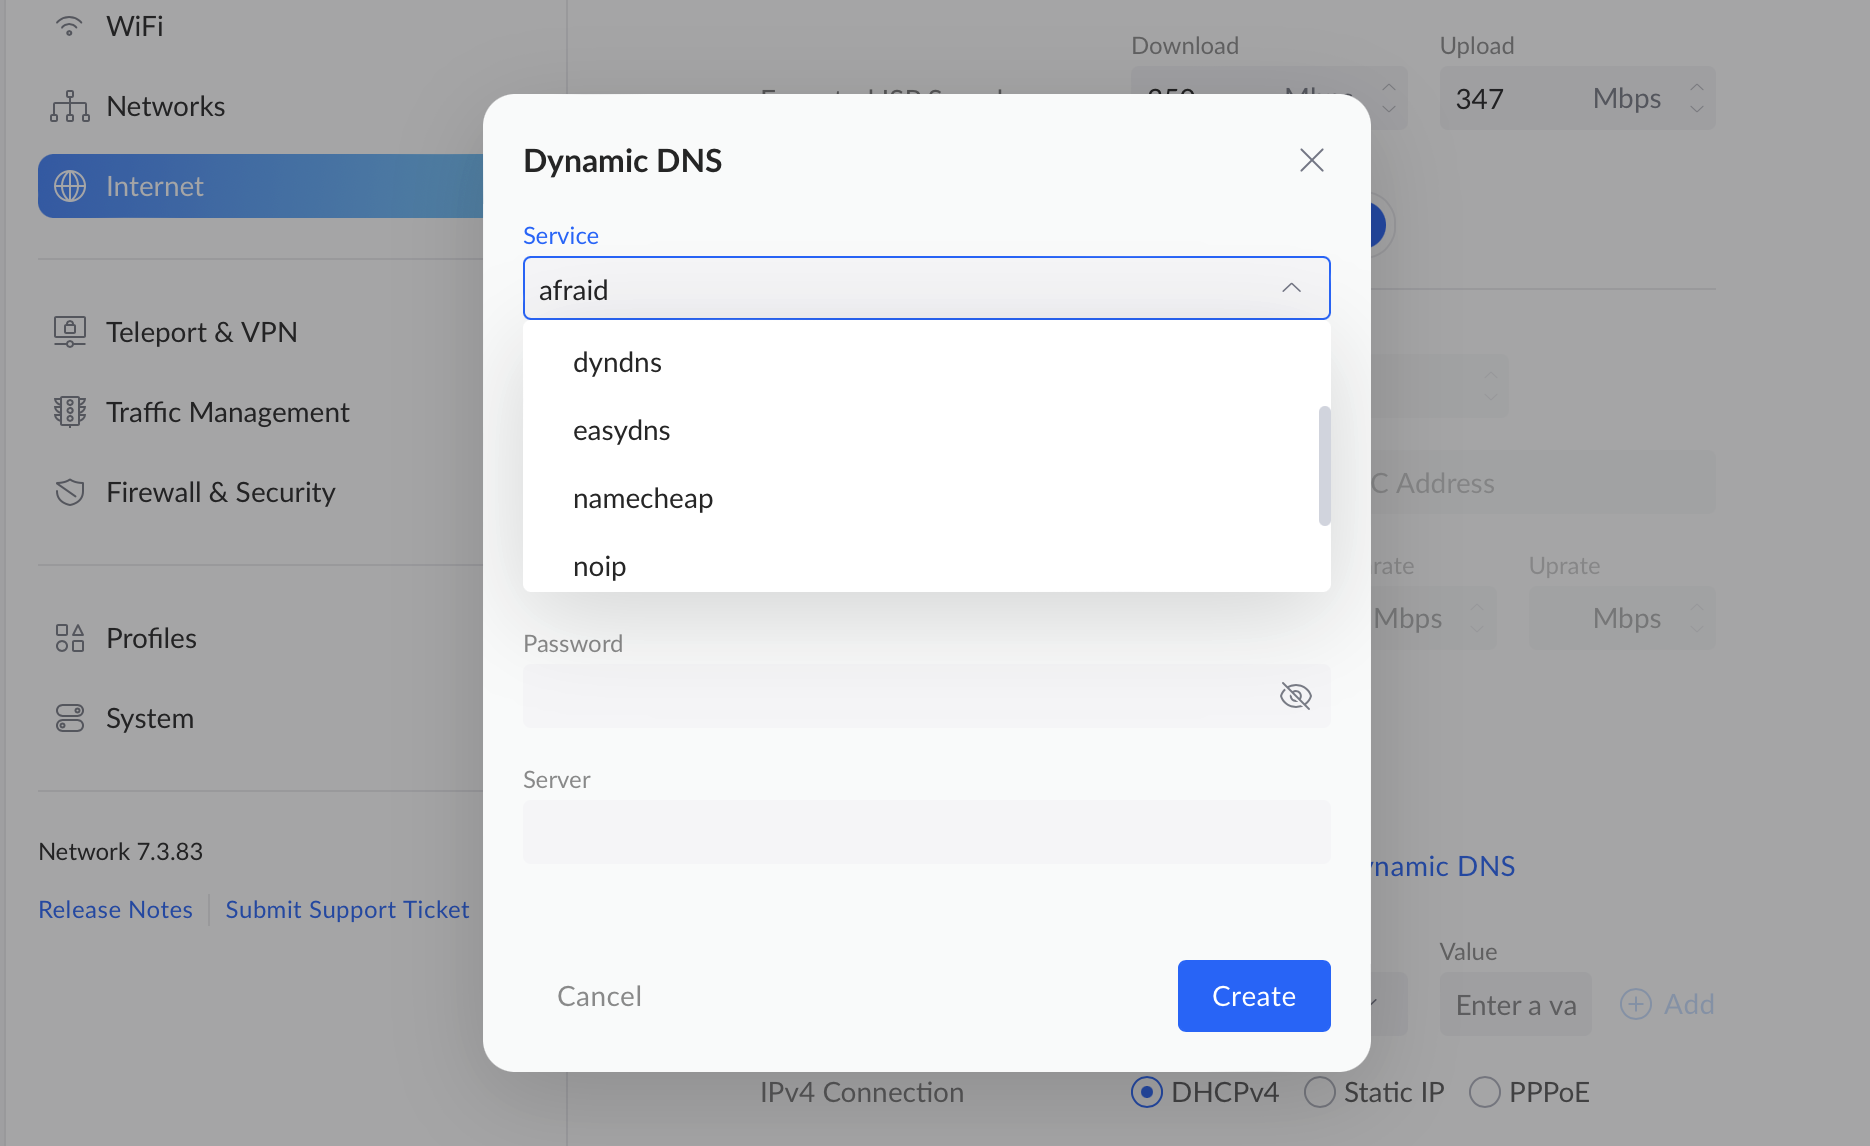
I did not plan to spend money or time on a custom DNS providers. Luckily I came across a post on reddit which had already built dyndns into an azure function. But I got enough inspiration to build a dyndns API on my own. The code is on github ahysing/dyndns and it is built for Azure Functions. Azure functions on Serverless SKU are basically free for this use.
Nice solution.
Domain
A domain is required to host a web site. My tool of choice is Azure App Service Domain. You create it and buy it and fill out the owner information.
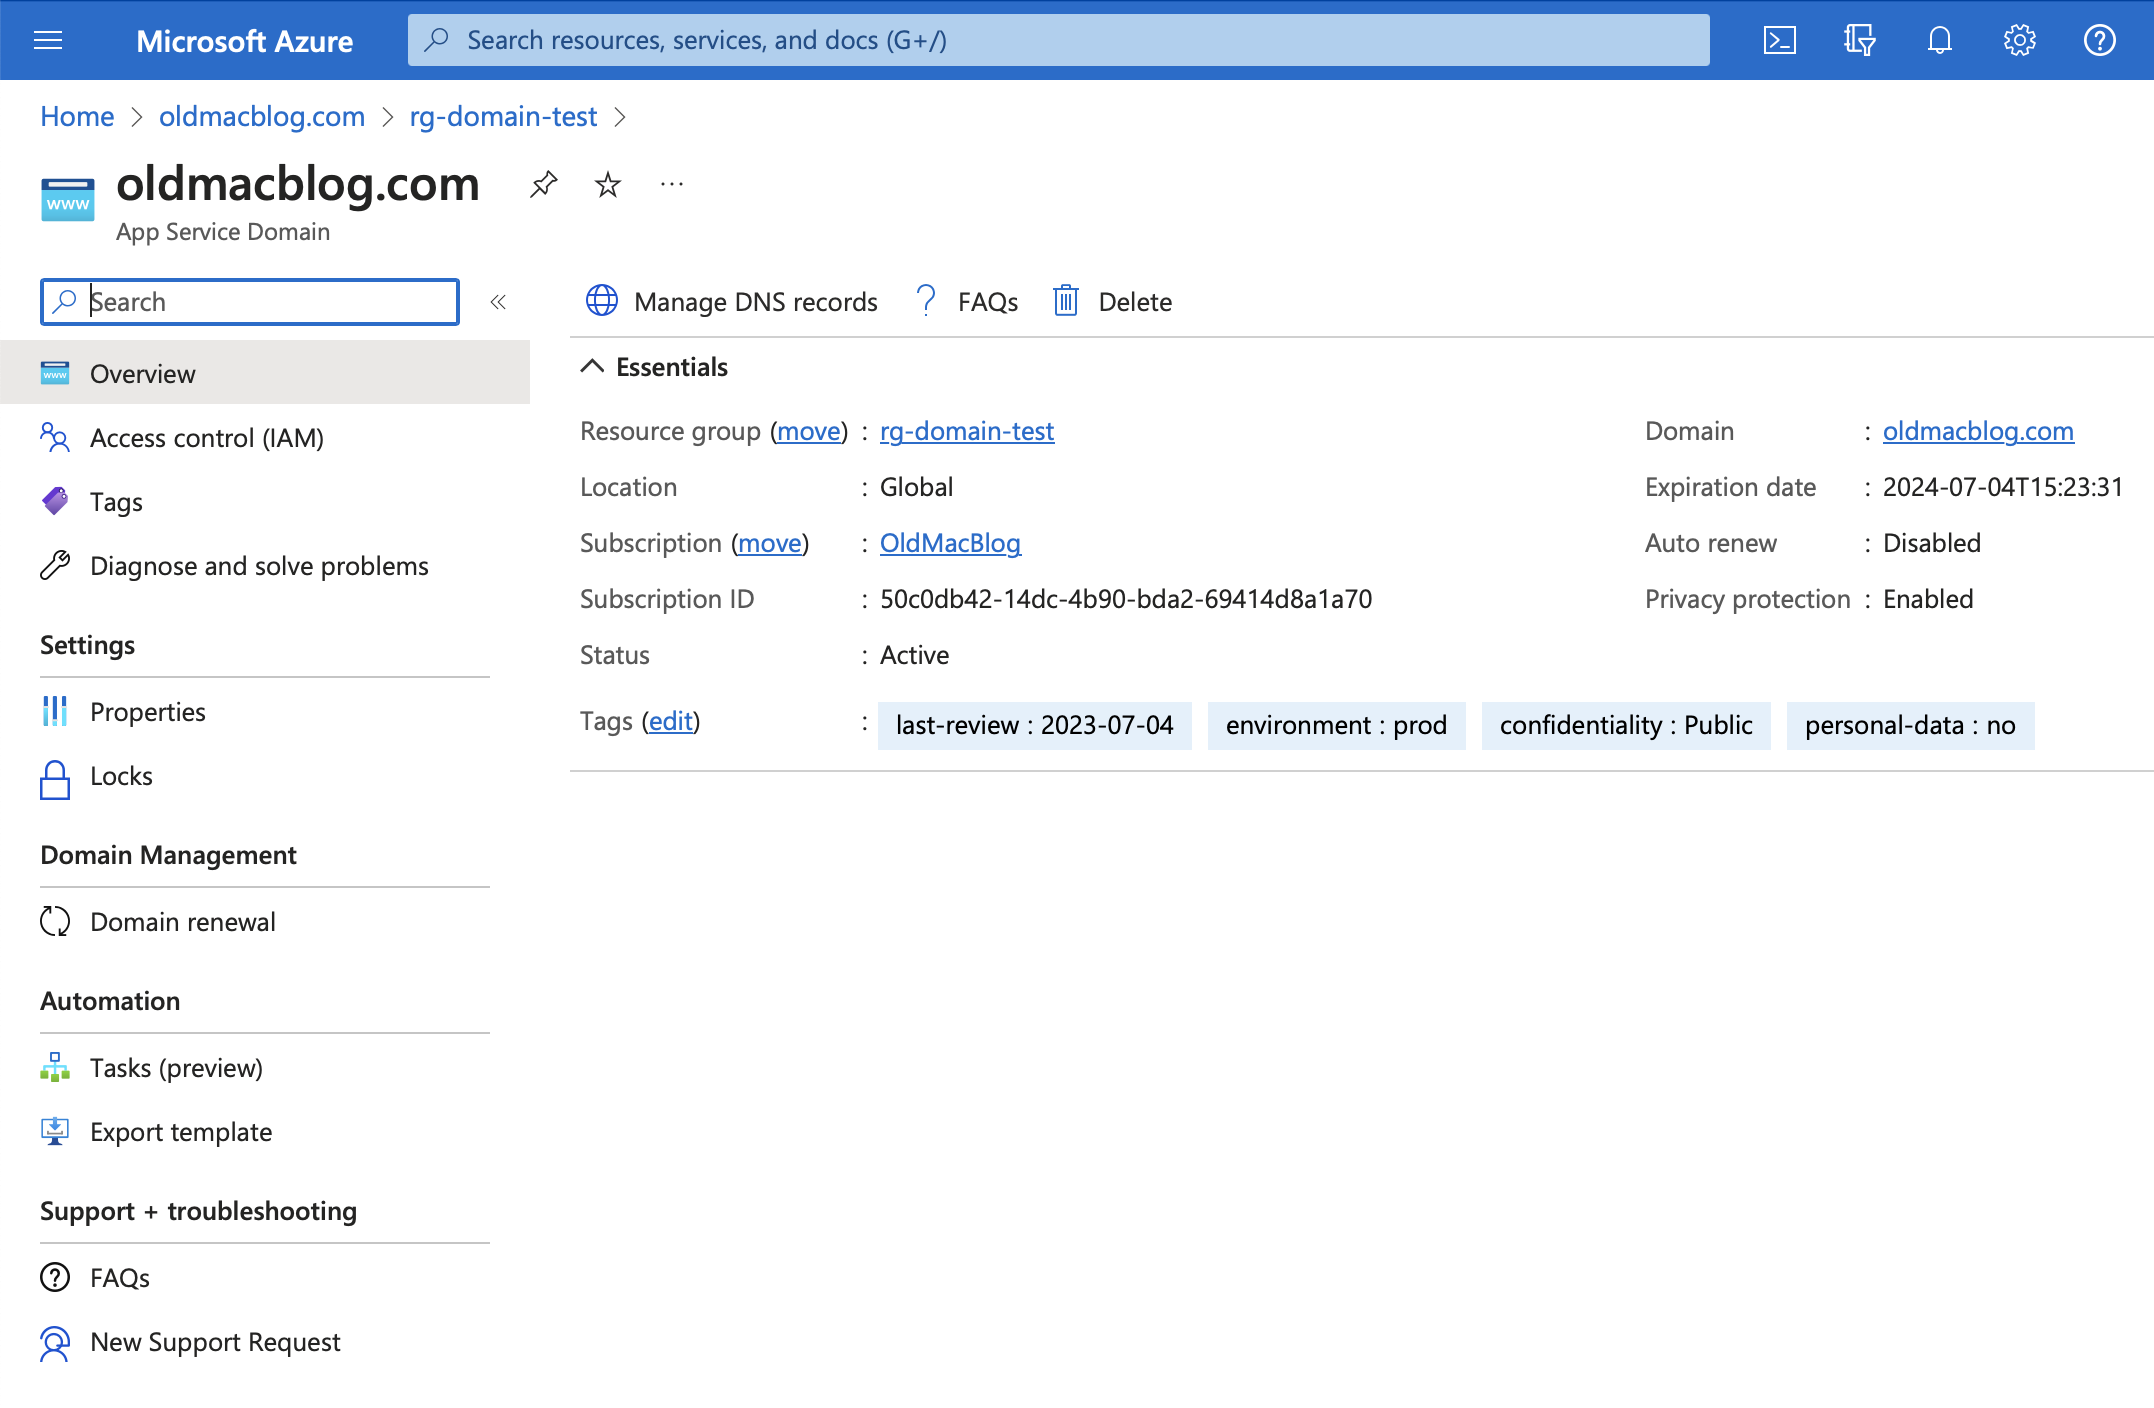
An DNS server is also needed, and the natural choice would be Azure DNS zone. Creating one from the azure portal is so simple you can probably do it while sleeping. It is free for all practical purposes.
The DNS server’s must point at the IP-address of the server. The Dynamic DNS API can only update an DNS A-record for a given subdomain. So my Dynamic DNS API updates an A-record dyndns.oldmacblog.com and my DNS-server is configured (once) with a CNAME-record from oldmacblog.com to dyndns.oldmacblog.com . That way oldmacblog.com is allways pointing at the latests IP-address.
HTTPS
At some point between the year the Mac Pro 1.1 was released, and today everyone agreed that SSL encryption AKA https is a thing. Encryption is great for security, but when use unencrypted HTTP these days you will see a big scary warning in the browser. In practice running without HTTPS is not an option.
For my use I wanted to use Let’s Encrypt as my Certificate Authority (CA). To get the SSL sertificate files I need to set things up I need a client. Let’s encrypt lists a set of clients on their site here. Finding a working one for Snow Leopard was harder than I thought. I had to go through them one by one until I found one which works. The list of not working clients is long. I have summarised them below.
| Name | Works on OSX 10.6.8 | Description |
|---|---|---|
| Certbot | ❌ | Certbot is python code. Python does not work. |
| GetSSL | ❌ | Looked promising for a while. I adopted the Azure DNS client scripts to show proof of ownership over DNS TXT-records. The next step step attempts to download Certificates over SSL and dies. |
| acme.sh | ✅ | |
| OpenBSD acme-client | ❌ | Code is available on github. Written in C, but GCC does not compile. Looks nothing like an OSX program |
| uacme | ❌ | Written in C with no dependencies. When installing this from macports we get “Invalid Instruction” failure when the program runs. The macports binaries are not built for such an old CPU |
| Apache httpd and mod_md | ❌ | No luck. After compiling the binaries Apache is not able to load the module. |
acme.sh
I ended up using acme.sh directly from github acmesh-official/acme.sh. The installation process was as as it said on the github page, and the Certificate renewal was just as easy.
# Use macports to install git
sudo ports install git

# Create a folder to work on
mkdir ~/code
cd ~/code

git clone https://github.com/acmesh-official/acme.sh.git
cd ./acme.sh
./acme.sh --install -m <myemail>@gmail.com
acme.sh --issue -d https://oldmacblog.com
The files I needed are placed under ~/.acme.sh/oldmacblog.com/.
Strong Encryption
The last step was just to configure apache to use those files.
In the file /opt/local/etc/apache2/extras/httpd-ssl.conf i dropped in the following configuration I found on Apache2’s SSL/TLS Strong Encryption: How-To.
SSLProtocol         all -SSLv3 -TLSv1 -TLSv1.1
SSLCipherSuite      ECDHE-ECDSA-AES256-GCM-SHA384:ECDHE-RSA-AES256-GCM-SHA384:ECDHE-ECDSA-CHACHA20-POLY1305:ECDHE-RSA-CHACHA20-POLY1305:ECDHE-ECDSA-AES128-GCM-SHA256:ECDHE-RSA-AES128-GCM-SHA256:ECDHE-ECDSA-AES256-SHA384:ECDHE-RSA-AES256-SHA384:ECDHE-ECDSA-AES128-SHA256:ECDHE-RSA-AES128-SHA256
SSLHonorCipherOrder on
SSLCompression      off
SSLSessionTickets   off
With encryption turned on I could go back to my site’s configuration in /opt/local/etc/apache2/extras/httpd-vhost.conf and change the relevant blocks of code. Notice how port 80 (for http) is changed to 443 (for https).
Listen 443
<VirtualHost *:443>
    <Directory /Users/andreashysing/Sites/oldmacblog.com/*>
        AllowOverride None
    </Directory>
    ServerName oldmacblog.com
    ServerAlias macpro.home.arpa

    SSLEngine on
    SSLCertificateFile "/Users/andreashysing/.acme.sh/oldmacblog/fullchain.cer"
    SSLCertificateKeyFile "/Users/andreashysing/.acme.sh/oldmacblog/root.key"
</VirtualHost>
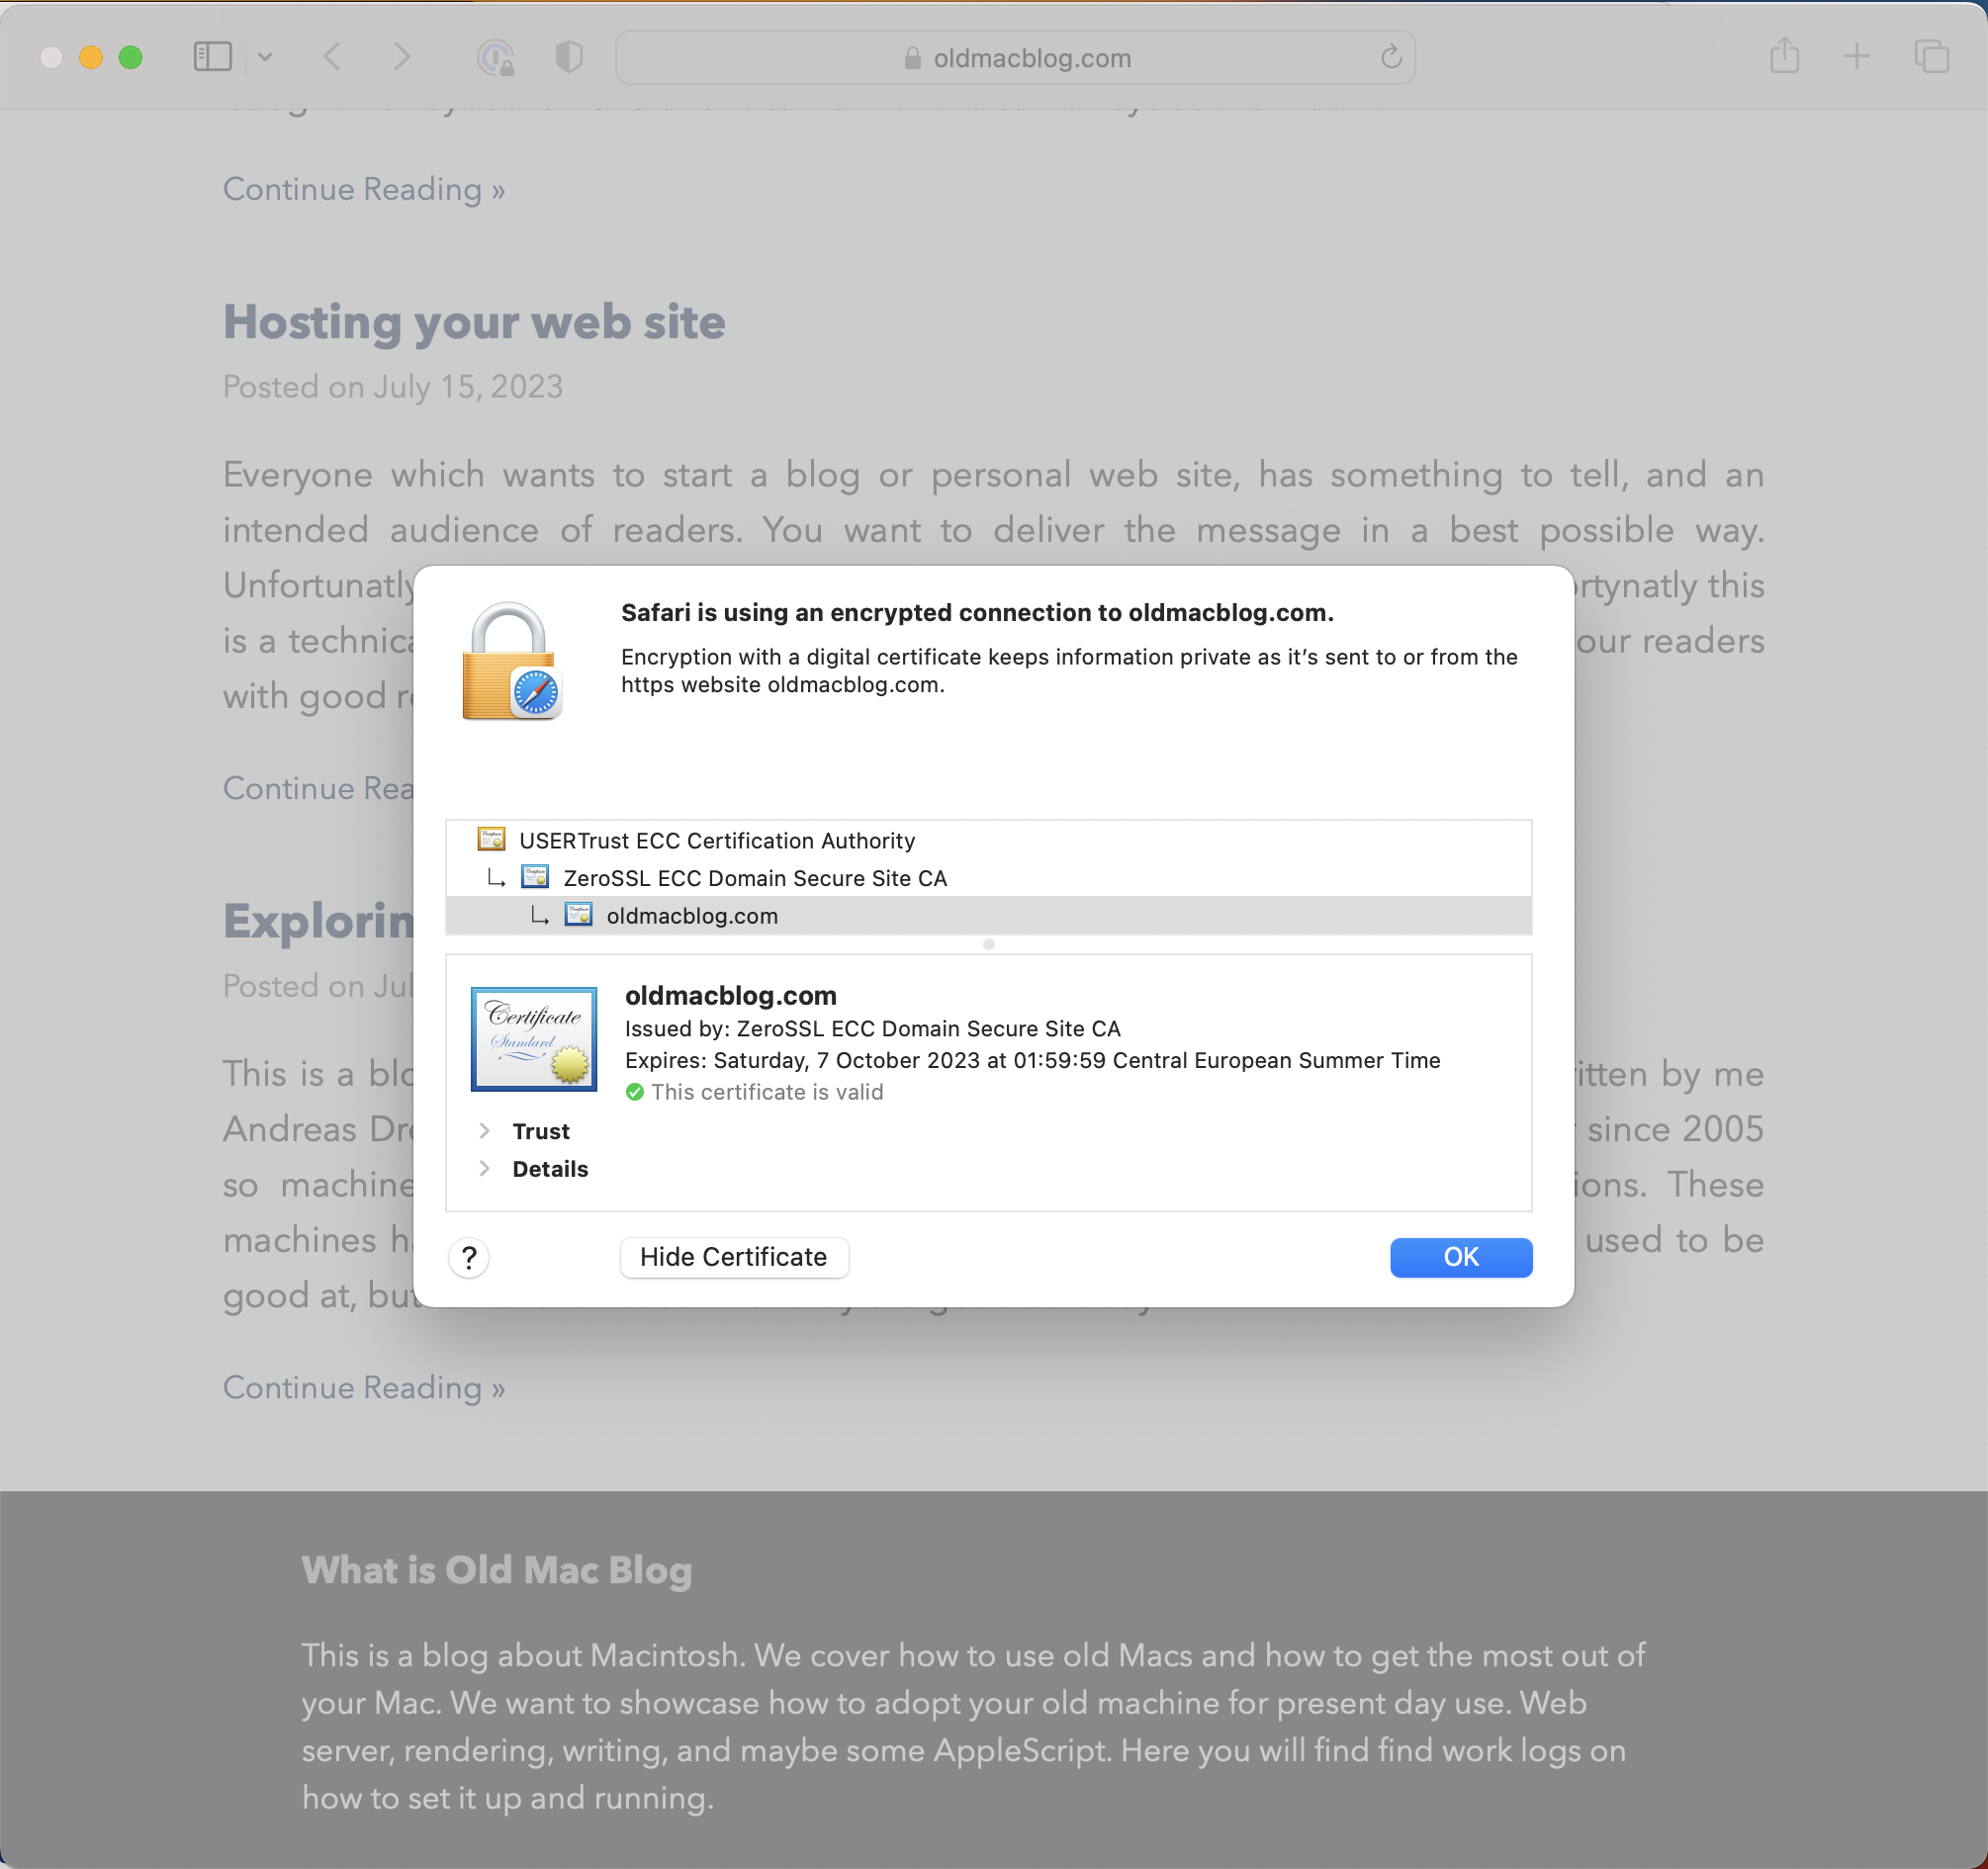
Testing SSL is best done in safari. You might notice that these certificates are actually authorised by ZeroSSL. I am happy with that. Then it worked at last.
Conclusions
I finally found myself a good use of my Mac Pro. Along the way I got practical experience with installing Apache, registering a domain on Azure. I learned about acme clients & SSL certificates and strong encryption.
My budget for all of this is
| Expense | Price | Cur. |
|---|---|---|
| Server | 600 | NOK |
| DVD-R DL for OSX | 250 | NOK |
| *1 Year of Electricity | 1765 | NOK |
| **Domain | 130 | NOK |
| Azure DNS | 0 | NOK |
| SSL Certificate | 0 | NOK |
| Sum | 2745 | NOK |
* This is 11.9 USD converted to NOK.
** Future power bills are good guesses at best.
Power usage dominates the costs in this budget. The machine draws max 318 W and idle 155 W source. Activity monitor reveals less than 5% CPU usage at all times. Therefore it is safe to say that it uses the idle power usage or roughly six low energy light bulbs. With a reasonable average power price of 0.9 NOK + 0.4 NOK in grid tariffs per kilowatt it costs 4.836 NOK per day to run this.
My Ubiquiti Dream Machine router is also worth a mention. It is a vital component, and I payed roughly 4000 NOK for it. Fortunatly that router I had already bought that router.
I ended up using Zero SSL certificates to get HTTPS. By doing so I saved 700 NOK on buying a certificate online.
As a comparison I could have visited domeneshop and for a web hotel, “web starter” or other packages. I would 5 GB of storage, user traffic counter from matomo, but it would cost me somewhere from 144 NOK (on domene shop) + domain cost of 130 NOK. Such alternatives comes without monitoring or web analytics, they costs one tenth of the price.
Also where is the fun in a web hotel? A dedicated server can be used for other hobbyist projects while serving as a web server.
The installation process was long and complicated, but also meaningfull and brought a lot of learning along the way. I have seen how a web server is set up from the bottom to the top. Hopefully someone learns web server configuration after reading this. Maybe you get inspired to repurpose an old mac as a web server too.